Animal Crochet Kit Beginner’s Complete Guide: From Unboxing to Your First Bunny

If you’ve ever scrolled past those tiny knitted bunnies and thought, “I could make that,” this is your moment. This guide walks beginners through a full, friendly, slightly imperfect (in the best way) process: unboxing your crochet kit, understanding each piece, and finishing your first little animal bunny.
What’s Inside a Real Crochet Kit

When you open a good crochet kit, you’ll usually find a compact little studio. Here’s what the kit I recommend typically includes:
- Yarns — several colors (body, ears, accents).
- Crochet hook — the main tool, often 2.5–3.5mm.
- Needle — for sewing parts together and weaving in ends.
- Stuffing — soft fill for plump shapes.
- Eyes — safety eyes or buttons to give personality.
- Knitting markers — handy to mark the start of rounds.
- Tape measure — to check size against the pattern.
- Safety scissors — small, sharp, and safe.
- Hot melt — a little glue for securing non-sewn bits (optional).
- Yarn board — keeps threads tidy, stops knotting.
- Packing bag — for storage or gifting.
- Keychain — convertibles so your animal can go on a bag.
- Instructions — the heart: diagrams, abbreviations, step-by-step.
And yes — the little extras — the needle, the knitting markers, even the keychain — are the difference between “I tried once” and “I keep making them.”
First Five Minutes: Unbox, Sort, and Breathe
Open your crochet kit, lay items on the table, and take pictures if you like — bragging rights later. Arrange yarns by color and label them (a scrap of tape works). Thread your needle, check your crochet hook feels good in your hand. If the instructions use abbreviations like sc, inc, dec — don’t panic. You will learn them in minutes.
Basics You Need: Simple Stitches for Beginners
You don’t need to memorize a million stitches. For amigurumi-style animal bunnies, start with:
- Chain (ch) — the base loops.
- Single crochet (sc) — the workhorse.
- Increase (inc) — two sc in one stitch.
- Decrease (dec) — sc two together.
Practice each for ten minutes on spare threads. Honestly, it helps — and then put the practice aside. Come back. Humans learn better when we fidget a little. [Click here for a complete guide to abbreviations and symbols for crochet chart]
Step-by-Step: Make the Bunny Body (Short Version)
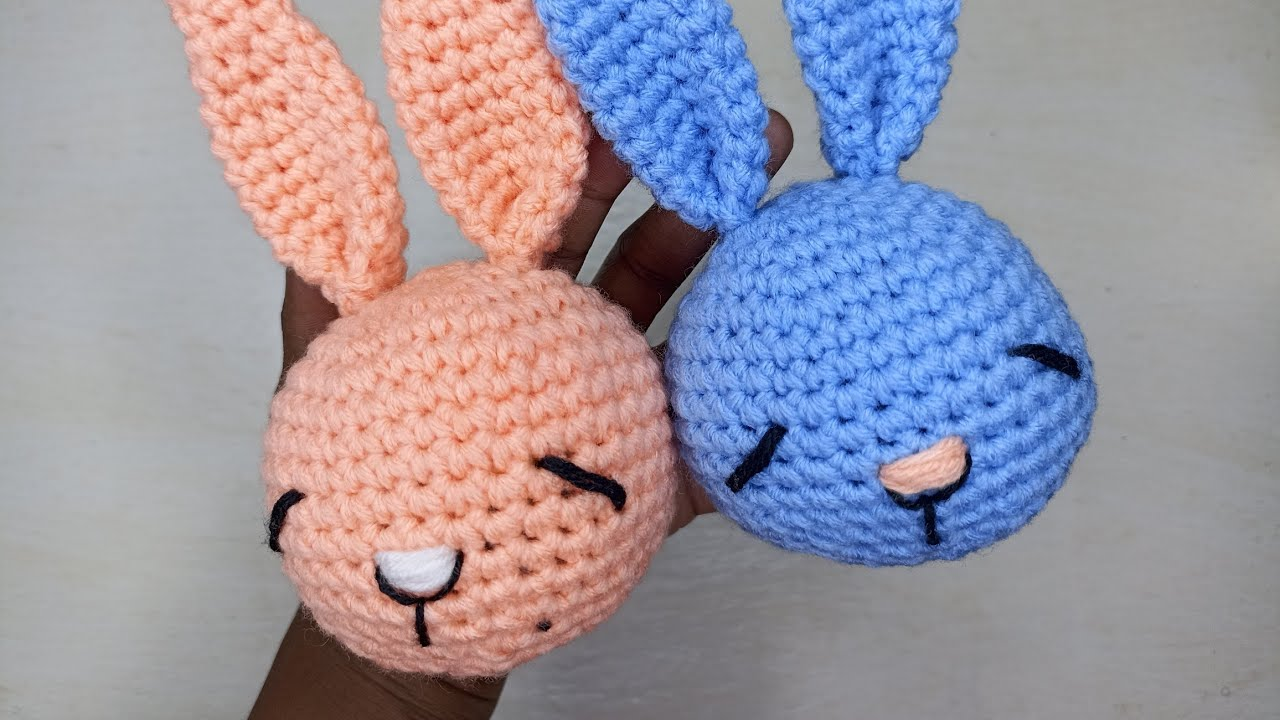
- Begin with a magic ring and work a small circle.
- Increase rounds to form a dome.
- Continue straight rounds for body height.
- Decrease to close — fasten off, leave a tail for sewing.
- Stuff gradually with stuffing (not too tight — not too loose).
If your bunny looks like a chubby pebble at first, that’s normal. Keep going.
Ears, Limbs, and Face — Where Personality Lives
Ears: usually a long oval — make two. Attach them upright or floppier, your call.
Limbs: make small cylinders; attach symmetrically.
Eyes: place them with a little space — too close gives a squished look, too wide makes a stare. Use safety eyes or embroider with needle and thread. Mouth: a few simple stitches can create a smile that wins hearts.
Small artistic liberties are allowed. In fact, encouraged.
Assembly & Finishing: Neat Seams Make it Look Pro
- Use the needle and spare yarn to attach parts with hidden stitches.
- Weave in ends carefully; hide knots inside.
- A dab of hot melt can secure loose pieces — sparingly.
- Add the keychain if you want a portable buddy.
- Use the yarn board to tidy leftover threads.
Take breaks. Your hands will thank you, and honestly, you’ll notice mistakes less when rested.
Common Hiccups and Quick Fixes
- Loops too tight? Try a larger crochet hook next time.
- Loops too loose? Use a smaller one or hold yarn differently.
- Pattern numbers don’t match? Count your stitches, use knitting markers.
- Yarn tangles? The yarn board is your friend — rewind and re-start if needed.
- Eyes don’t sit right? Remove and re-place before stuffing fully.
Small mess-ups are actually progress. They mean you’re experimenting.
Project Time & Who This Suits
Most beginners finish a small bunny in 2–4 hours spread over a weekend. This project is great for kids with supervision, adults looking for a meditative hobby, or gift-makers prepping for Christmas markets. Turn it into a coasters-sized practice if you want faster wins.
Variations & Mini-Projects to Try Next
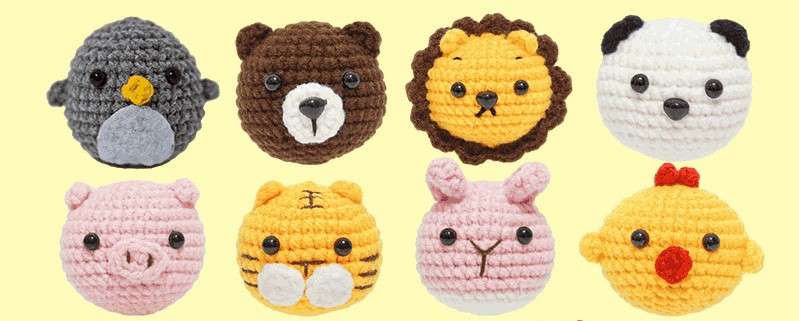
- Swap colors for a seasonal plant-themed bunny (greens and soft browns).
- Make a penguin instead of a bunny — same techniques, different charm.
- Turn small animals into keychain buddies or ornaments for holiday gifts.
- Use different threads to get fuzzy or smooth textures.
The idea is to remix. Your pattern, your personality. Our crochet kits feature not only bunnies, but also cute animals like birds, lions, and pigs! Shop Animal crochet Kit Now and start crafting your favorite!
Final Thoughts
You don’t need perfection. The imperfect stitches make the animal feel handmade — which is the point. If you want structure, follow the instructions. If you want creativity, riff on the colors. Either way, you’re learning and creating something cute with your hands.
Get your crochet kit now and start your creative crafting journey!