Craft Your First Cute Penguin: A Fun Beginner’s Crochet Kit Adventure!

Imagine a small, round penguin perched on your desk, stitched by your own hands. Cute, right? If you’ve been curious about craft projects, a crochet kit can be the perfect beginning — quick wins, low setup, and surprisingly soothing. It is suitable for teenagers and adult beginners (of course, children can also do it under supervision).This guide will take you through most of the details about the penguin crochet kit.
What’s in Your Crochet Kit?
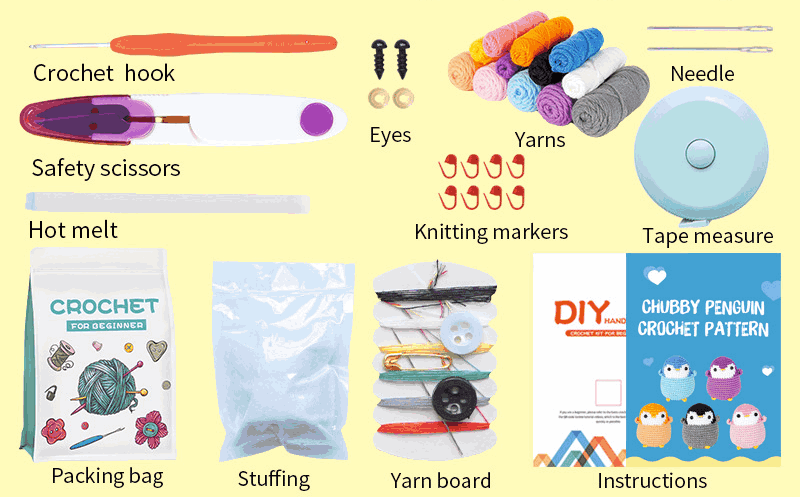
A solid crochet kit gives you all the essentials so you can jump straight into a satisfying DIY project. Your penguin kit should include:
- Crochet hook — the main tool (newbie-friendly size).
- Yarns — classic penguin trio: black, white, and orange.
- Stuffing — makes the body plush and huggable.
- Needle — for sewing parts together.
- Safety scissors — small and safe for trimming yarn.
- Eyes (safety eyes) — to give your penguin that expressive look.
- Knitting markers — mark the start of rounds; lifesavers.
- Tape measure — to check size consistency.
- Yarn board — organize your colors, avoid tangles.
- Hot melt — optional, for tacking down tiny bits.
- Packing bag — keep everything tidy (travel friendly).
- Instructions — clear step-by-step guide, usually with photos or diagrams.
That list? It’s basically everything between foam-blanket projects and professional pattern packs. For a beginning crafter, having the right needle and markers changes the game.
Prep: Small Rituals That Matter
Before you start: set up a cozy spot. Light? Good. Music? Optional. Coffee? Recommended.
Practice two things for five minutes: chain stitch and single crochet. They’re the backbone of most dolls. Use a scrap of yarn from the kit — nothing dramatic. This tiny rehearsal helps you control tension. Also, sort your yarn on the yarn board and place knitting markers within reach. You’ll thank yourself later.
Step-by-Step: Build Your Penguin
Step 1 — Start the Body (Magic Ring)
Use the crochet hook and black yarn to make a magic ring. Work in rounds, increasing as the pattern tells you. Put a knitting marker at the first stitch of each round so you won’t lose your place. Keep the tension even — not too tight, not too loose. If you’re unsure, pause and compare to the instructions.
Step 2 — Make the Belly (White Panel)
Switch to white yarn and crochet an oval or panel according to the pattern. Flatten it gently and use the needle to sew it centered onto the body. If the edge gaps, a tiny dot of hot melt (careful!) can help secure it.
Step 3 — Flippers and Feet
Crochet two flippers (black) and two little orange feet. Use the tape measure to keep them similar in size. Sew them onto the body with the needle. Quick tip: leaving a small tail of yarn lets you tuck and hide the knot neatly.
Step 4 — Eyes and Beak
Position the eyes evenly — usually a few rows above the belly. Push them in until they click (follow the safety instructions). For the beak, use a short piece of orange yarn to stitch a tiny triangle; it’s surprisingly expressive.
Step 5 — Stuff and Finish
Stuff the body with the provided stuffing. Aim for plumpness that still allows gentle give. Sew the final opening closed, weave in loose ends with the needle, and trim with the safety scissors. Stash everything back in the packing bag.
Total time? Expect around 2–4 hours at this beginning stage (split across sessions if you prefer). For children, shorter sessions are better — 20–30 minutes at a time.
Personalize It — Make It Yours
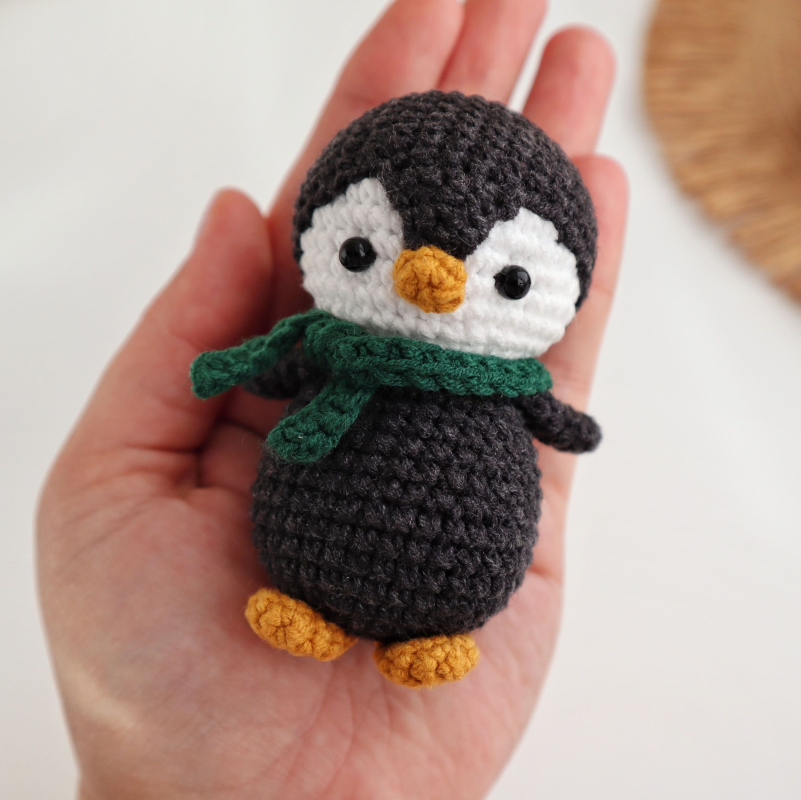
This is where the project gets fun. Add a tiny scarf (great for christmas themes), a bow tie, or even miniature coasters nearby for a decorative vignette. Swap yarn colors to make a pastel penguin or a festive black-and-red scarf combo. If you plan to sell on platforms like Etsy, small accent changes (different eyes, tiny embroidered patterns) can turn a hobby into a side gig.
Beginner’s FAQ
What If My Finished Penguin Doesn’t Look Exactly Like the Pattern?
Totally normal! Every handmade project has its own personality. Maybe your penguin is a bit rounder, or the wings sit differently—that’s part of the charm of DIY. As long as you followed the basic steps, it’s still a cute and unique animal you created.
How to Crochet Kit?
Start with the instructions in the kit. Then, search for short tutorial videos (visuals help when you’re at the beginning). Practice stitches separately and re-read the pattern slowly. Don’t be afraid to frog (undo) — it’s normal.
Where to Buy Crochet Kits?
You can buy crochet kits at your local craft store, or you can browse and purchase HERE. We have a wide selection of different crochet kits on our website. Come and find the one that’s perfect for you.
Tips for Crocheting Myself
- If your stitches are inconsistent, try a smaller hook.
- Keep a scrap yarn sample to match gauge later — useful if you want to turn the crochet kit into a pattern for a blanket or a line of toys.
- For kids, skip small detachable parts or use embroidered eyes instead of safety eyes. Safety first.
Wrap Up — Your Beginning Matters
A crochet kit is a tiny, portable workshop. It’s a soft introduction to rhythm, texture, and the quiet joy of making. Whether you’re a teen, an adult seeking a calm hobby, or a parent looking for a crafty project to do with children, this penguin project is approachable and cute.
Ready? Grab that kit, settle in, and enjoy the process. And if you’re shopping, choose a kit that includes tools (a true all-in-one makes your beginning smoother).
Get your penguin crochet kit now and start your creative crafting journey!